Guide
How to Refresh Old Furniture: DIY Upcycling Guide
In an age where sustainability and individual style are highly prized, breathing new life into old furniture is one of the most rewarding and cost-effective DIY projects you can undertake. Whether you have inherited a dusty chest of drawers, snagged a bargain on Gumtree, or just grown tired of a piece you already own, refreshing furniture allows you to create unique, high-quality items that simply cannot be bought in a chain store.
For the homeowner, this process, often called upcycling or renovation, is an act of resourcefulness, turning bulky waste into treasured centrepieces. This comprehensive guide will walk you through the entire process from evaluating your piece to applying the final coat of wax, ensuring your project is successful, safe and sustainable.
Phase 1: Preparation and Assessment
Restoration vs Renovation: Defining Your Goal
Before starting, it is essential to understand the distinction between restoration and renovation. Restoration aims to return an item to its original historical state using traditional materials. Genuine antique pieces, typically 100 years or older, should often be left to professional restorers to preserve their value.
Renovation refresh upcycling involves refurbishing furniture so that it looks new or entirely different from its original state, often by adding modern paint, new handles, or changing its function. This guide focuses primarily on this creative and accessible approach.
Structural Integrity and Essential Repairs
Your furniture must be stable before applying any decorative finishes. Tackle these structural issues first. Over time, wood glue joints can weaken. Carefully scrape away the old residue, apply fresh wood glue, and secure the joint with clamps until the glue is completely dry. For wobbly hinges and drawers, if a screw hole is stripped, fill the hole with wood filler or wood putty. Once dry, you can re-drill the hole and refasten the hinge securely.
For sticky drawers, try rubbing candle wax or silicone spray on the runners to improve movement. If you encounter veneer damage, a thin layer of wood glued over a base, apply a small amount of wood glue underneath any loose sections and hold it flat with a heavy object while drying. To fix bubbles, try heating the area with an iron on a medium temperature to reactivate the old glue or use a syringe to inject wood glue into the bubble before clamping it down.
Deep Cleaning and Surface Correction
This step prepares the surface for the new finish by removing dirt, grime, and old polish residue. Start with an Initial Clean using a solution of mild washing-up liquid diluted in warm water. For stubborn grime or sticky spots, you can use a small amount of white spirit, testing on a hidden patch first. For heavily soiled or vintage pieces, a Gentle Scrub with ultra-fine Steel Wool Grade 0000 alongside a specialist wood soap helps lift embedded dirt.
Remember to wipe dry immediately; never leave standing water on wood. If you plan to stain, paint or re-wax, you must remove old finishes using a dedicated Wax and Polish Remover, which creates a good key for the new finish.
Finally, fix surface flaws. Minor scratches and dents can be disguised using a Retouch Crayon or wax filler in a matching shade. Fill deeper damage with wood paste or wood putty in several layers. Light Water Stains can sometimes be polished away with furniture polish or, surprisingly, a little toothpaste.
Phase 2: The Three Paths to Refreshment
Once your furniture is clean, stable and repaired, you can choose the method that best suits your style.
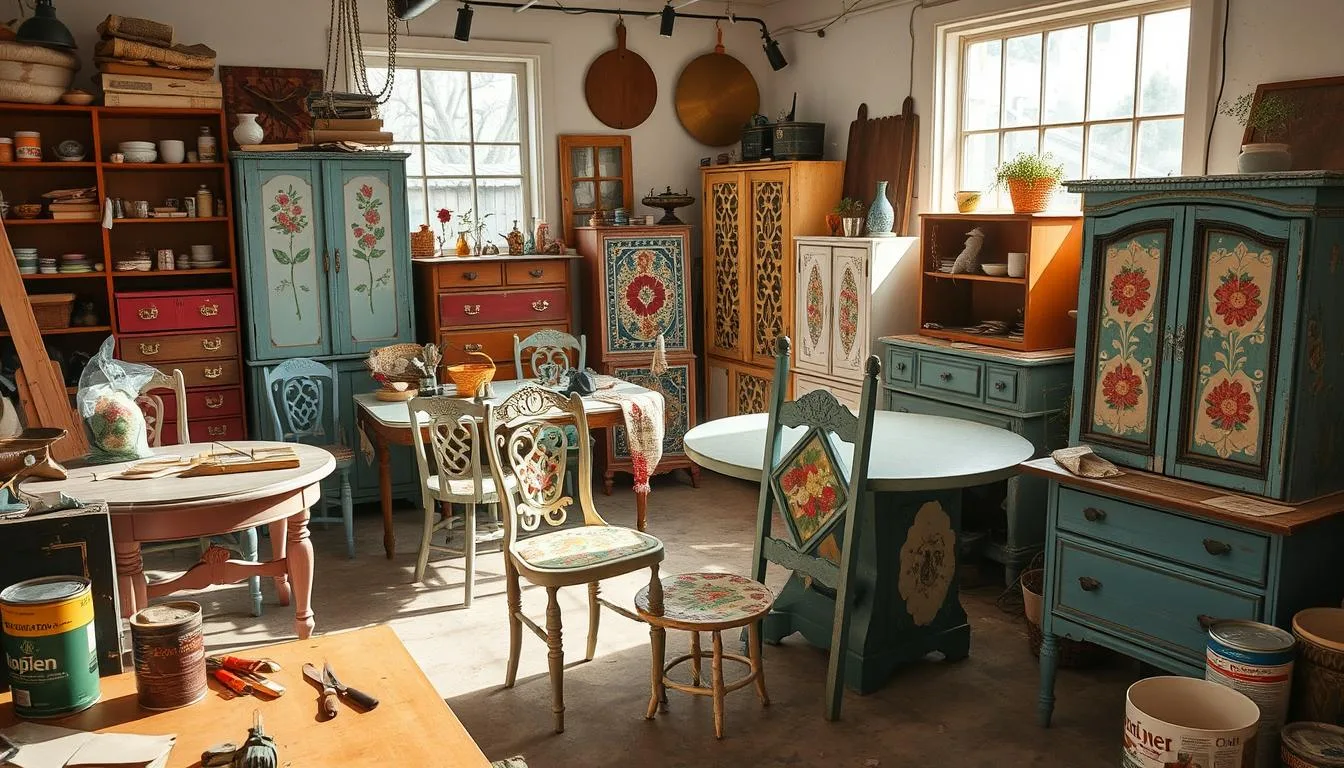
Path 1: The Paint Transformation
Painting is the most dramatic way to change the look of a piece and is a great way to hide imperfections.
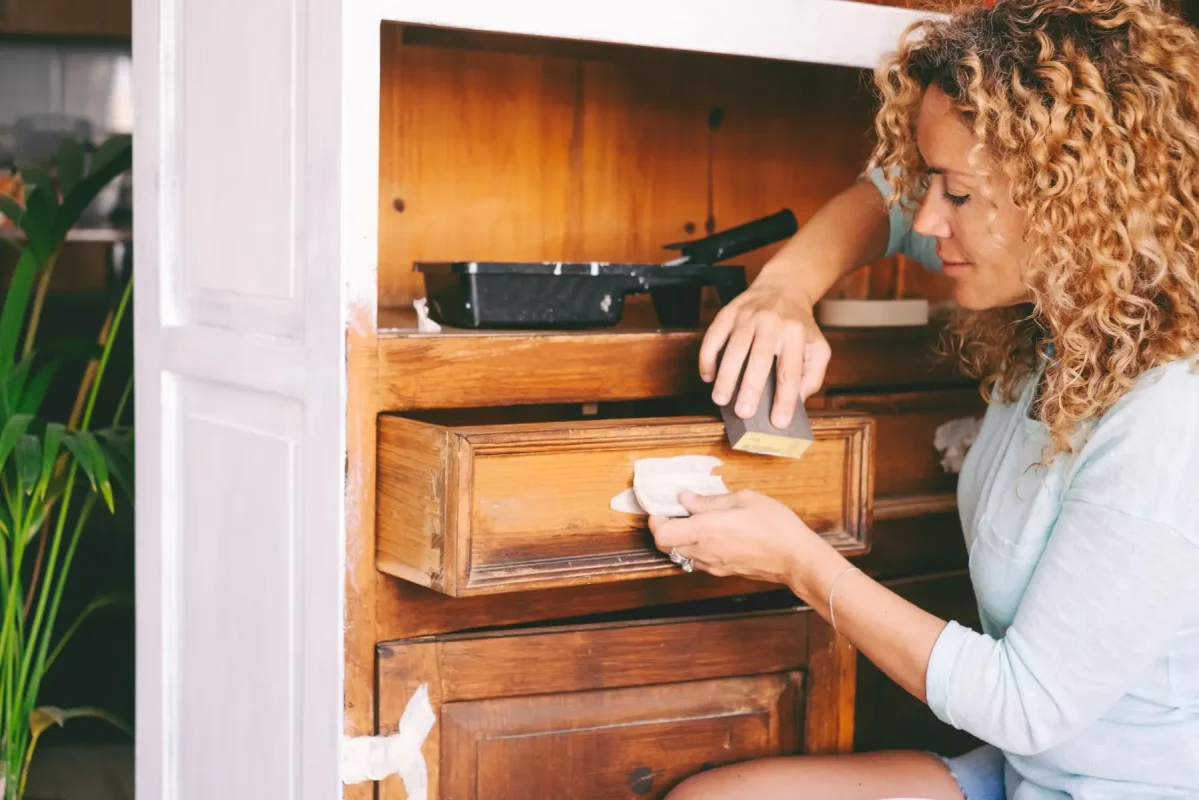
Step 1: Surface Preparation for Paint
For glossy, flaky or heavily varnished pieces, the existing finish must be removed or properly keyed. Use a paint stripper and a spatula to remove thick layers of paint. Sanding creates the perfect surface for paint to stick to. Use a multi-sander or orbital sander for large flat areas. Start with a medium grit 120 and finish with a fine grit 180 or 240.
Always sand in the direction of the wood grain. Avoid sanding veneered furniture vigorously as the layer is very thin. After sanding, vacuum up all dust and wipe the piece down with a tack cloth or a cloth dampened with white spirit before priming. Apply a good-quality furniture primer, as this is essential for preventing stains or bleed-through from showing through light-coloured paint.
Step 2: Painting Techniques
For a simple transformation, you can use acrylic paints, acrylic varnishes or chalk paints. These are excellent for covering old finishes and to achieve the fastest, most even finish. Consider using a paint sprayer to avoid brush strokes. If you prefer a Distressed or Shabby Chic Look for a vintage worn style, apply two full coats of paint and once dry, use a medium grit sandpaper to carefully rub away the paint on the edges, corners and raised decorative details. This reveals the wood underneath, creating an authentic aged look.
For a Modern Vintage Look for Metal furniture, such as cabinets, start with a spray paint base colour. When dry, take a brush and two contrasting paint colours and alternately dab a small amount of each colour over the surface to build up a textured, aged look. Gently roughen the edges with sandpaper to finish the effect.
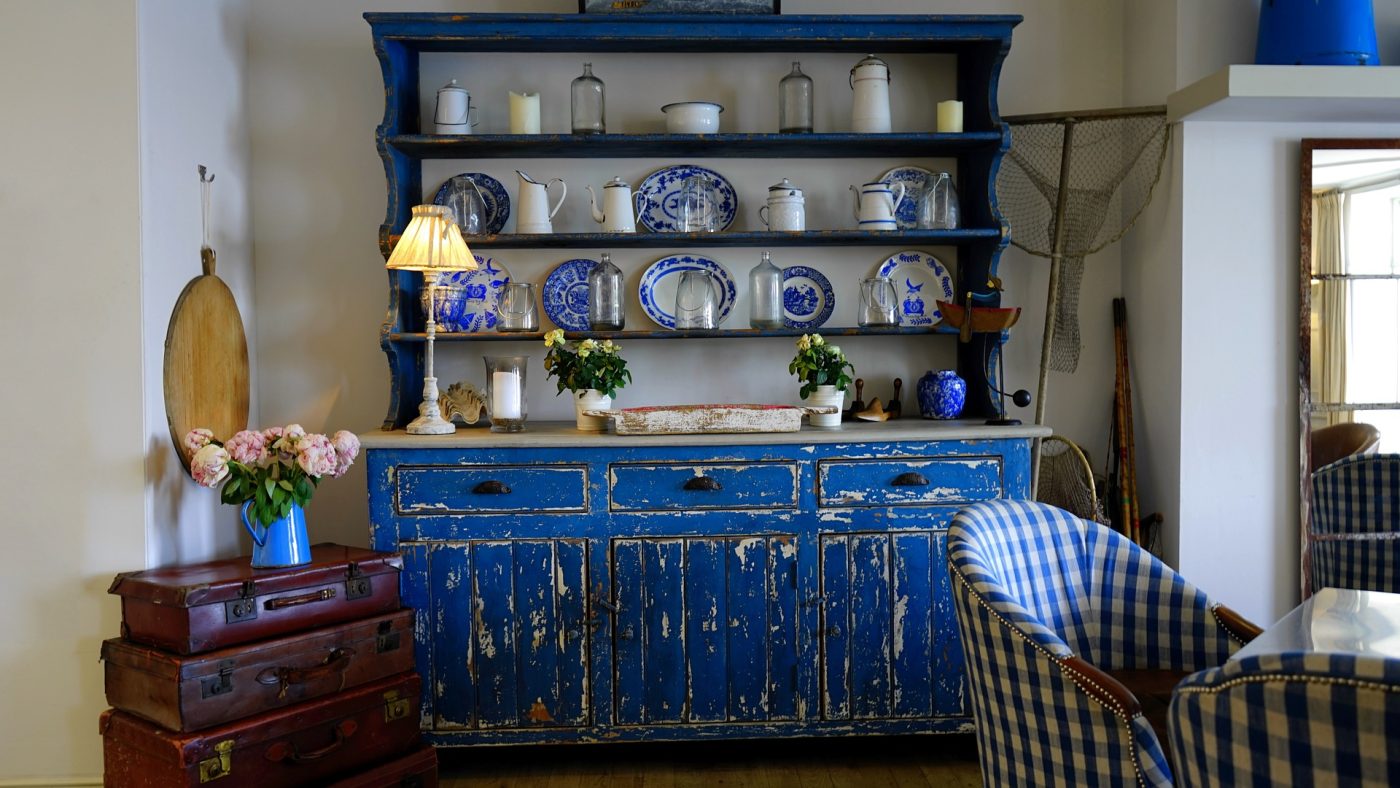
Path 2: Restoring Natural Wood Beauty
If your furniture has beautiful wood grain, enhancing the natural material is the ideal choice. Sanding should be done with 180 240 grit in the direction of the grain to ensure a completely smooth and dust-free surface.
For a quick revival of vintage wood with minor damage, speciality products like Restore-a-Finish or similar UK alternatives can be rubbed on with a rag to blend existing finishes and fill minor imperfections, restoring the colour depth in minutes. If you want to change the wood tone, apply wood stain evenly with a brush or cloth. Once the stain or reviver is dry, you must protect the wood. Waxing provides a beautiful soft sheen.
Apply a high-quality product like Wax Polish Black Bison, a popular choice, using Ultra Fine Steel Wool Grade 0000 and buff vigorously with a clean soft cloth. Danish Oil or similar wood oils are excellent for feeding the wood and providing a durable, natural finish. Shellac is another option, a natural resin that dries quickly and is often used for a traditional high-gloss antique look.
Path 3: High Impact Detail Upgrades
Sometimes the biggest change comes from the smallest details. Simply Replacing Hardware, swapping out old, tired knobs and pulls for new, modern brass handles, ceramic pulls or genuine vintage hardware, can instantly transform a piece. For a touch of hidden luxury, use The Felt Touch by cutting out felt fabric to line the bottom of the drawers to prevent items from rattling.
You can even cut strips of sturdy felt and secure them with screws to create unique soft drawer pulls. For chairs, benches or metal frames, you can use thick cotton yarn, often called cotton spaghetti, to wrap around sections of the frame, adding texture, colour and a modern, softer feel. Finally, for a splash of pattern, apply Contact Paper or Wallpaper to the tops of tables or the back panels of shelving units.
Phase 3: Advanced Projects
Simple Seat Upholstery
Re-covering a simple chair seat is one of the most accessible upholstery projects. First, unscrew the base of the chair seat from the frame. If needed, replace the foam using suitable foam grades, typically RG 35 50 soft or RG 50 70 firm.
Cut your chosen upholstery fabric to size, leaving several inches of overlap around the edges. Pull the fabric taut over the cushion and affix it to the underside of the wooden seat base using a tacker staple gun. Ensure the pattern is straight as you tack. Finally, screw the newly upholstered seat back onto the chair frame.
Decoupage and Stencilling
Use stencils or decoupage glueing cut-out paper designs to create complex patterns. Simple geometric patterns like a zig-zag design on a chest of drawers can be achieved by carefully marking the lines with tape before painting different colours.
Phase 4: Tools, Safety, and Budgeting

Essential DIY Toolkit
For safety, you will need PPE including goggles, heavy-duty gloves and a face mask, especially essential for sanding dust and strippers. Your main tools are a Sander, such as an orbital or multi-sander, for flat surfaces and Clamps in various sizes for securing glue joints and veneer. You must have Sandpaper Abrasives in grits 120, 180, 240 and Ultra Fine Steel Wool Grade 0000.
Retouching supplies like wood glue, wood paste, putty and retouch crayons are vital for repairs. For finishing, use quality synthetic brushes or spray equipment. For cleaning, use cleaners like white spirit, tack cloth, and wax polish remover. Finally, you need basic Hardware tools such as a screwdriver, drill, and a tacker or staple gun for upholstery.
DIY Savings Compared to a Specialist
Doing the work yourself offers huge savings over hiring a professional. Here is a rough cost comparison based on UK prices:
For filling a small hole with wax, a specialist costs £30 to £50, while your DIY cost is only Wax putty, £5 to £8, saving you up to £45.
Re-glueing a wobbly chair costs a specialist £20 to £60, but your DIY cost for wood glue is just £3 to £4, a saving of up to £57.
Sanding and repainting a table is £150 to £300 professionally, but your DIY cost for sandpaper and paint is only £11 to £31, a saving of up to £289.
Upholstering a small armchair professionally costs £600 to £1000, but your DIY cost for Foam Board and Fabric is only £20 to £50, potentially saving you up to £950.
Sealing a chest of drawers can cost a specialist £400 to £600, but your DIY cost for Shellac and Wax is only £20 to £50, saving you up to £580.
Final Thoughts: Crafting Your Own Heritage
Refreshing old furniture is more than just a money-saving venture; it’s an opportunity to save a piece of history and imbue it with your own style.
By taking the time to properly assess repair and apply one of the three core refreshment paths, whether through bold paint, deep wood restoration, or simple detail upgrades, you can create an item that is not only beautiful but truly unique. Take pride in your resourcefulness and enjoy the process of turning the unloved into the unforgettable.