Guide
How to Repair Broken Sleigh Bed frame – Step by Step
Mattresses and box springs often cost more than a thousand dollars, with a cheap frame underneath. It is not surprising that they become loose or broken. Older bed frames are better than their contemporary counterparts, but attrition affects them in the same way. Bed Frames absorb a lot of punishment, but if they can’t handle it, they are easier to repair than some simple materials.
Cracks and Splits
Cracks and splits, which are one of the most common problems, develop when there is no proper support in the bed frame. The split is usually on either side or horizontal grain lines at either end of the frame. Other damage occurs when the bed rails split along the grain lines. This could be due to poor wood or when too many people use the bed at the same time, overweight. Cracks or fissures are usually near the ends but can also be concentrated on the rails. Fix this type of damage by removing the bed rails first. Fix it with glue, clamps, and some scrap wood.
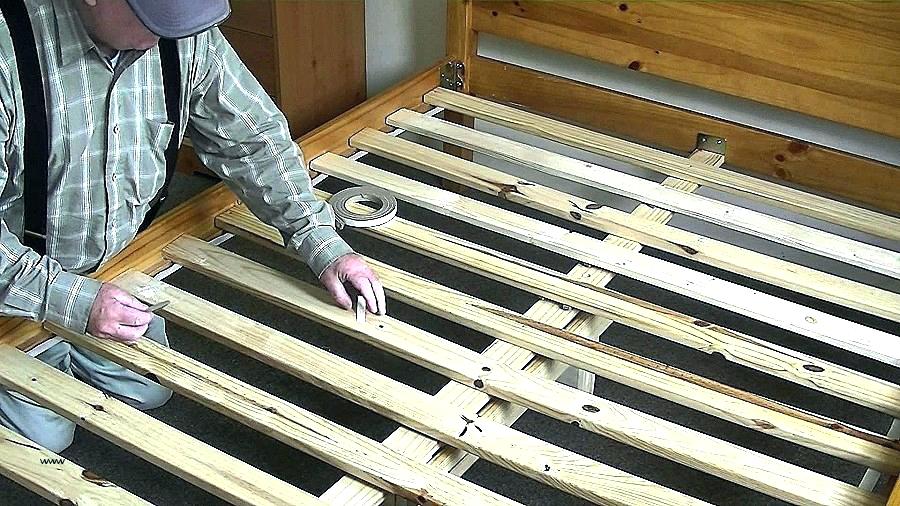
Step 1: Strip the Bed
Remove the mattress and box springs. Leave the slats in place.
Step 2: Pry the Split Open
Depending upon the size of the crack, insert a screwdriver into the hole inside the frame and open it slightly. Clean splinters or chips and other particles as needed with a utility knife so the glue can create stronger bonds. If the split is longer than six inches, insert knives every three inches, or evenly spaced.
Step 3: Add Glue
Use the thin blade of the strip knife, to glue, to fill the inside of the crack. Apply glue to the split using the tip of the glue bottle with one hand as you open the split with a knife. Do one section at a time. Apply deep glue to the split using your fingertips. Apply more glue as needed until the glue comes out from the opposite side of the split or the distribution glue is satisfied. Remove the knife.
Step 4: Add Clamps
Place the bar clamps on the entire frame and tighten until the glue extends beyond the length of the crack and across the wood perpendicular to the split. Place clamps every three inches, evenly spaced, if the split is longer than six inches. Tighten the clamp until the glue comes out. Allow the clamps to remain on the frame overnight.
If the split is on unfinished wood, you do not need to clean it. It’s okay to let it dry and sand it later. If you see a line of glue on the finished wood after removing the clamps, use a stain marker or putty stick to cover it.
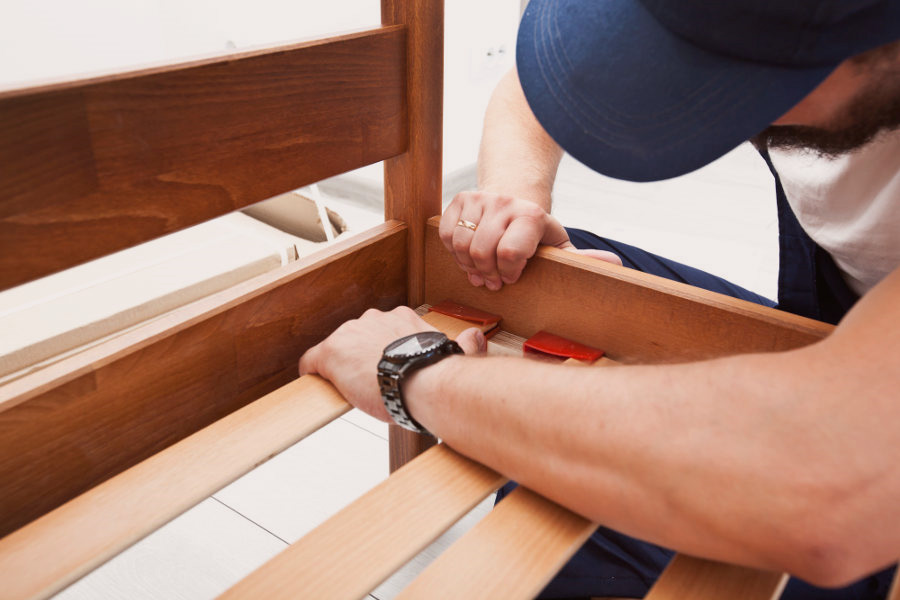
Step 5: Reinforce the Joint
Once the glue is completely dry, you can reinforce the joint. Measure the length of the split on the inside and add 6 inches. Measure the width of the bed frame. Use a table, or meter R, to cut a 1/2 inch plywood strip – almost any type of scrap wood will suffice for measurement.
Step 6: Drill Holes
Pre-drill the scrap piece with a 3/16-inch bit and drill/driver, randomly placing the holes about 2 inches apart. The patch holes are tilted so that they do not line up with each other.
Step 7: Glue and Screw
Now you have prepared everything and applied a uniform layer of wood glue to one side of the scrap plywood. Place it on top of the split inside. Drive 1-inch screws through the plywood using the pilot holes. Allow the frame to dry overnight before using the bed.
The Takeaway
If you were wondering how to fix a broken sleigh bed frame and avoid slipping on a new one, now you have two simple but effective solutions. You don’t have to get out of bed if something breaks, you can fix it yourself. Once you have done some projects you will get a hang of it. Before you even realize it, you’ll be looking for other things to repair. So don’t shy away from challenges because that’s what the big manufacturers want. Knowing how to fix a broken bed frame is proof that you don’t have to rely on shops for everything. Remember, anything is possible with a lot of ambition.
How to Fix a Broken Sleigh Bed Frame
Whether you are moving or just rearranging your furniture (bad) things can happen and you may encounter a broken bed frame. Overtime bed frames can cause problems due to natural wear and tear. This is quite annoying and probably the last thing you need after a long day. If you need to purchase a new bed frame it can cost thousands of dollars. Repair them yourself to avoid paying these high prices.
The way you fix the bed frame will depend on how damaged the frame is. In some cases, it might be as simple as using some wood filler to fix a crack. In others, you may need a deeper solution, such as replacing broken elements. As we have seen, there are some different methods that you may need to adopt. To make it easier to find the right solution, let’s look at some common problems, why they occur, and how they can be solved.
Fixing Cracks and Splits
One of the most common problems is cracking and splitting at the base of the bed. This can be very dangerous. But if solved properly, you should be able to continue using the bed safely.
Why They Occur
Usually, this is because the bed frame is not getting the support it needs. Cracks and splits (known in industry as wood testing) occur when the wood shrinks as it dries. Wood shrinks almost twice as much with growth circles (radially) as it crosses circles (tangentially). It is the uneven shrinkage that causes the checks to form.
Once the crack is resolved, you will be able to work on adding more support later. This can often mean installing a few new beams to strengthen the existing structure.
How to Fix Cracks in Sleigh Bed Frame
First, you will need to remove the bed cover, mattress, and box spring. Inspect the bed frame in case of cracks. The bed slot may not be the only place where damage occurs. Second, You may need to use a screwdriver to disassemble now or while you are repairing. Once you have done that, you should have a good idea of the size of the crack. This will determine the approach you take.
Fixing Small Cracks
If the crack is not too severe, you will be able to patch it with some putty. To do this, you will need to use the following steps:
- Using sandpaper, try to make the sides of the cracks as smooth as possible. This will ensure that the wood filler is effectively attached
- Place the wood filler in the split, until the crack is filled
- Use a putty knife to remove excess filler
- Leave to dry
- In some cases, you may want to paint over the putty, which will make the crack less visible
Fixing Big Cracks
In some cases, you might be unable to patch up with filler. In this case, you need to use a more intensive process, following these steps:
- Use sandpaper to smooth the sides of cracks
- Wipe the area with a damp cloth. This will make it easier to glue the two sides together
- Using a clamp, measure both sides. You need to be able to hold them firmly
- Once the clamp is ready, apply the wood glue freely to each side of the crack. Because it can be a messy process, you’ll want to use an old blanket to hold any glue to protect your furniture
- Clamp down on the area
- Use a putty knife to remove any excess glue
- Leave the glue to dry
- Remove sandpaper from excess glue, create a smooth surface
- The crack must now be fixed. To avoid repeating this process, you may want to consider adding some extra support to the frame